Design Details
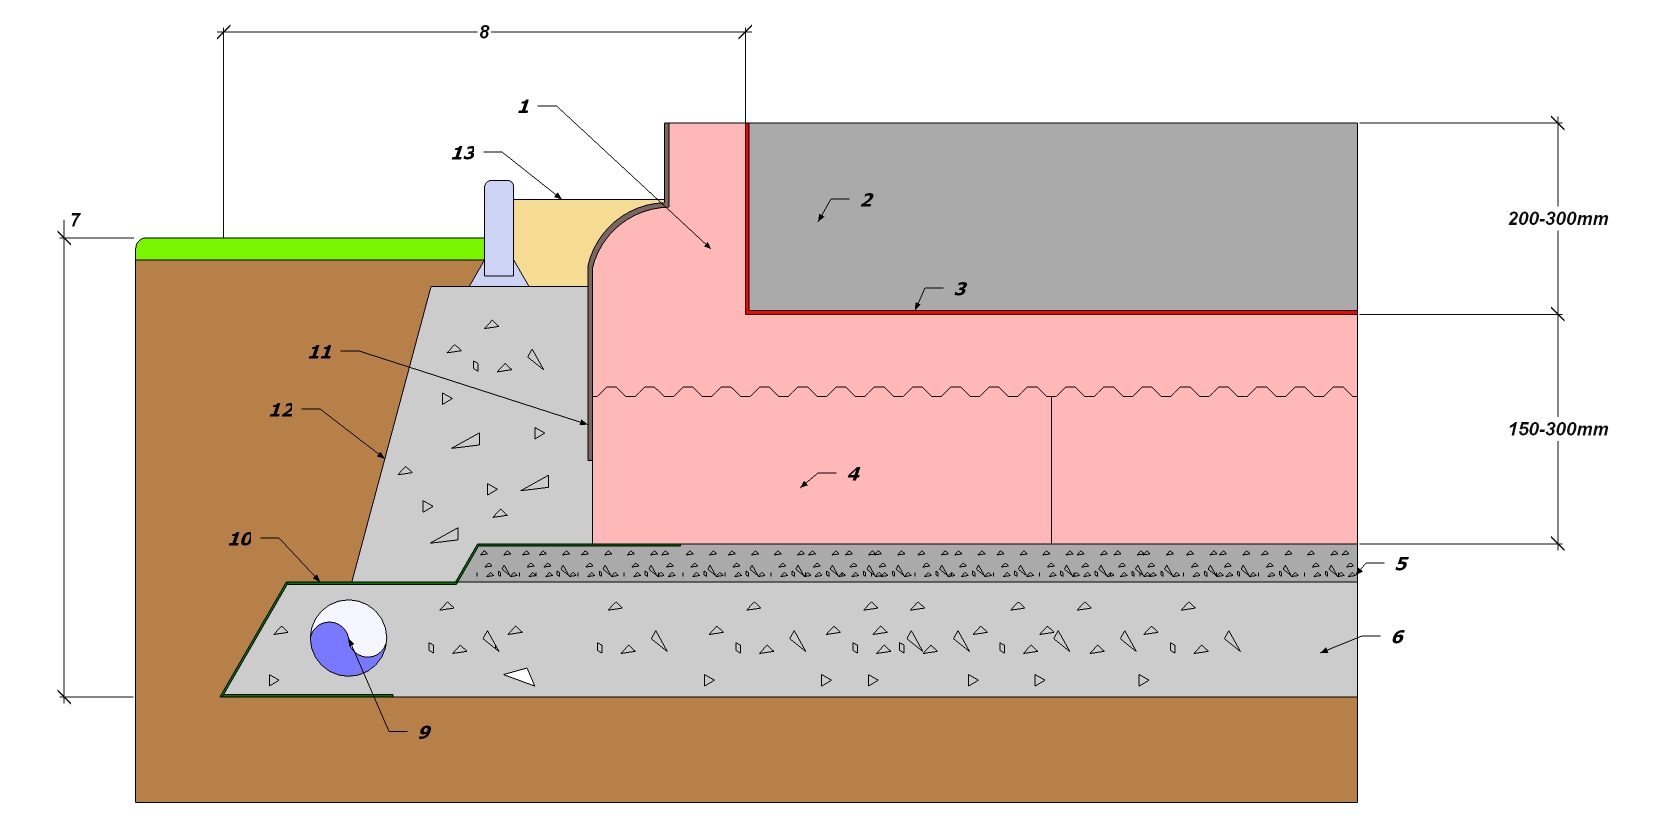
1 : The Edge Module
The edge module is available in 3 standard widths, (100, 150 or 200mm) depending on the amount of insulation to the edge of the slab and the junction detail with the wall make up. It is designed to securely lock together on site to provide the shuttering for the concrete without additional support.
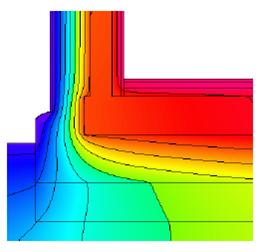
`The curved shoulder of the standard edge module is a deliberate feature designed for reason separate functions.
Firstly the additional insulation is provides protects the bottom corner of the slab thermally. See how the Isotherms are pushed away from the slab, indicting a highly effective junction detail.
Secondly the shoulder deflects rain away from the base of the wall and the foundations.
If you require an alternative edge detail, please call to discuss the options.
2: The Concrete Slab
The most common way to design the foundation for an Isoquick slab is as a flat, concrete raft of consistent thickness. This approach simplifies the installation of the dpm and reinforcing fabric.
This thickness of the slab and the amount of reinforcement is determined by the weight of the superstructure. The heavier the building, the wider the floor span and the closer the loads are to the edge the thicker and more heavily reinforced the slab.
Using a flat slab also removes the need for edge thickenings. While sometimes unavoidable, edge thickenings complicate things. They tend to significantly reduce the amount of insulation at the edge of the slab, the very place were you need it the most. They also complicate the ground preparation and steel work required.
Typically this style of design will use between 1/2 and 2/3rds of the concrete that would have been used in strip footings for the same building, and eliminate the need for sub base walls, beam and block, separate floor insulation and screed.
3: DPM
The dpm is most commonly placed on top of the Isoquick modules and under the concrete slab. By placing leaving the membrane overhanging the edges during concreting it makes it relatively straight forward to join the dpm to the air-tightness membrane continuously.
4: The base and Top modules
The Isoquick boards are designed for fit together into a rigid formwork and eliminate any straight path through the insulation for heat to escape.
Made from a high performance grade of EPS which is specifically designed for in ground use, the Isoquick boards are designed to minimise water pickup from the ground, to ensure maximum thermal performance for the life of your building.
The thermal performance of the Isoquick boards will not degrade with time and is consistent whatever thickness of board you need.
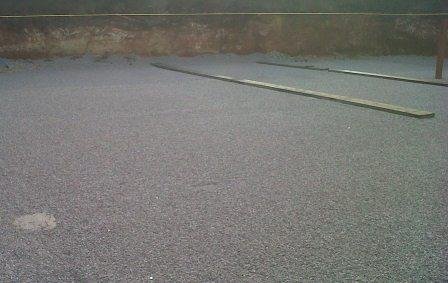
5: Blinding layer
It is important that the Isoquick modules sit on a flat and level base, so that the concrete is fully supported and to ensure a flat and level concrete surface for your building.
Over and above this it is also important that this blinding layer should be free draining and free from fine particles. This will ensure a capillary break is created under the slab prevent moisture rising up to the insulation layer.
6: Sub base
The sub base material will transfer the load from the building into the ground, and will be specified and detailed by a quantified structural engineer. It is most commonly made up of layers of Type 3 MOT, at least 150mm thick, rolled and compacted into place.
7: Formation depth
The formation depth will vary depending on local soil conditions and, if clay building on clay, the proximity of trees. By designing the slab as a raft the weight of the building can be widely spread and bearing pressure can be minimised to allow economic construction. The minimum formation depth is 450mm, to avoid frost heave, although 5-600mm is more common. The raft design can also resist clay heave at formation levels approximately half that of traditional strip footings.
8: Sub base area
When designed as a raft the stone sub base should extend beyond the edge of the concrete by 0.5m plus the depth of the fill under the raft. (This includes the stone, blinding and Isoquick). This ensures the base is adequately supported. As a side benefit it also means you can operate around the building without getting stuck in the mud, from very early in the project.
9: Land drain
While not often necessary a land drain should be considered if the water table is likely to rise above the level of the sub base for prolonged periods,due to high water levels in the soil or heavy rain.
10: Geotextile
A geo-textile will help prevent the free draining stone around the perimeter being clogged by soil.
11: Protective layer
Before back filling the edge modules will need a protective layer to defend against mechanical and UV damage. There are various options available and we can advise on suitable materials.
12: Back fill
The back fill material should prevent mechanical damage to the edge modules ( e.g. from diggers or gardeners). It should also be free draining. Clean stone, or previous (no-fines) concrete are ideal.
13: French drain
A french or gravel drain perimeter detail is a neat way to finish the back filling at ground level. The broken texture of the stone not only ensure good drainage, but reduces splashing against the wall finishes compared to a solid surface like paving slabs.
The above details are meant as a guide and as with most things there are alternative details for specific problems. Please feel free to contact us to discuss your requirements.